

How To Create Digital Planner In Goodnotes
There are plenty of digital planning apps to choose from but the one I've used the most is Goodnotes. It has plenty of handy tools that persuaded me to change my mind about digital planning. I'm not completely sold on converting 100% to digital planning but do like using Goodnotes occasionally due to these tools.
This post contains affiliate links. If you click one of the links and make a purchase I'll receive a small commission (at no extra cost to you) in exchange for referring you.
For digital planning I use an Apple iPad (6th generation). If you don't have one already, invest in a Stylus pen. It is much easier than typing text and more accurate than your finger when tapping on buttons. I use the Apple Pencil,
1. Lasso Tool
This tool is one of the best things about Goodnotes! You can use your stylus pen to draw around something and then:
- Tap and hold the Stylus pen, select 'copy' and then paste it wherever you want on the same page, a different page in the same notebook or in a different notebook or planner
- Reposition – hold the stylus pen and drag. You can do this with text, digital stickers, images etc.
- Duplicate
- If you have repeat tasks you can copy and paste them as many times as needed
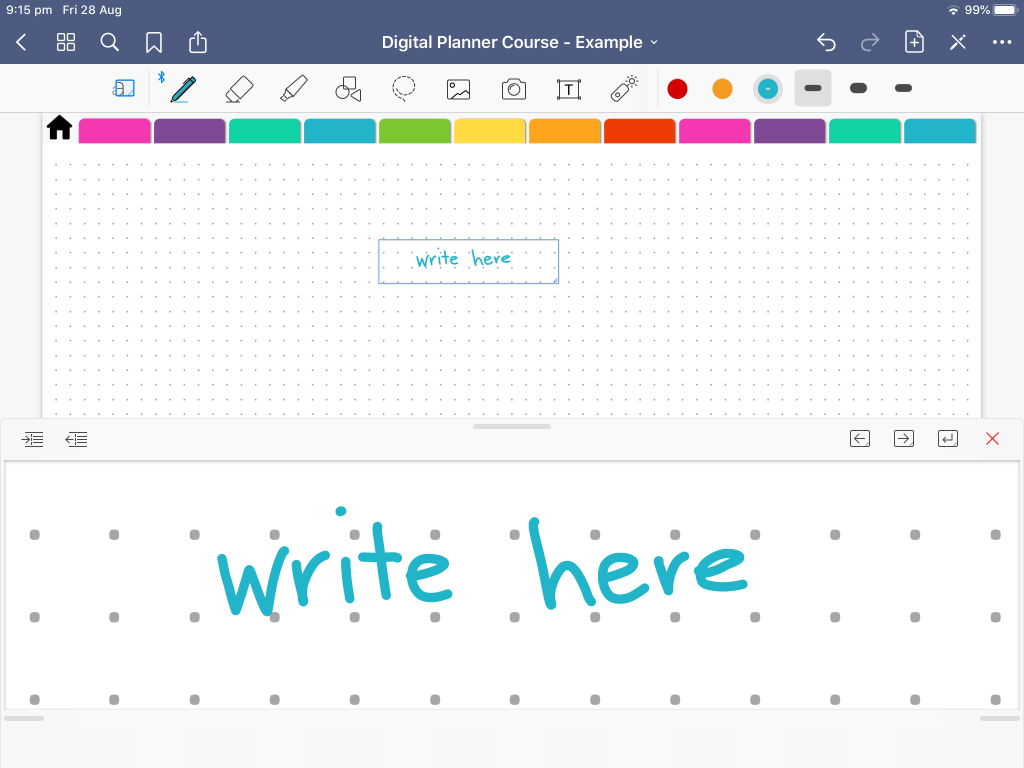
2. Zoom in to write
Zooming in (by touching your iPad screen and spreading 2 fingers apart) makes it easier to write, especially in a vertical layout with narrow columns.
If you don't want to zoom in, select the button on the far left of the Goodnotes menu (the box with the a), this brings up a bottom bar where you can write. It will magnify that section of the page so you can write bigger but it will be 'actual size' in proportion to the page.
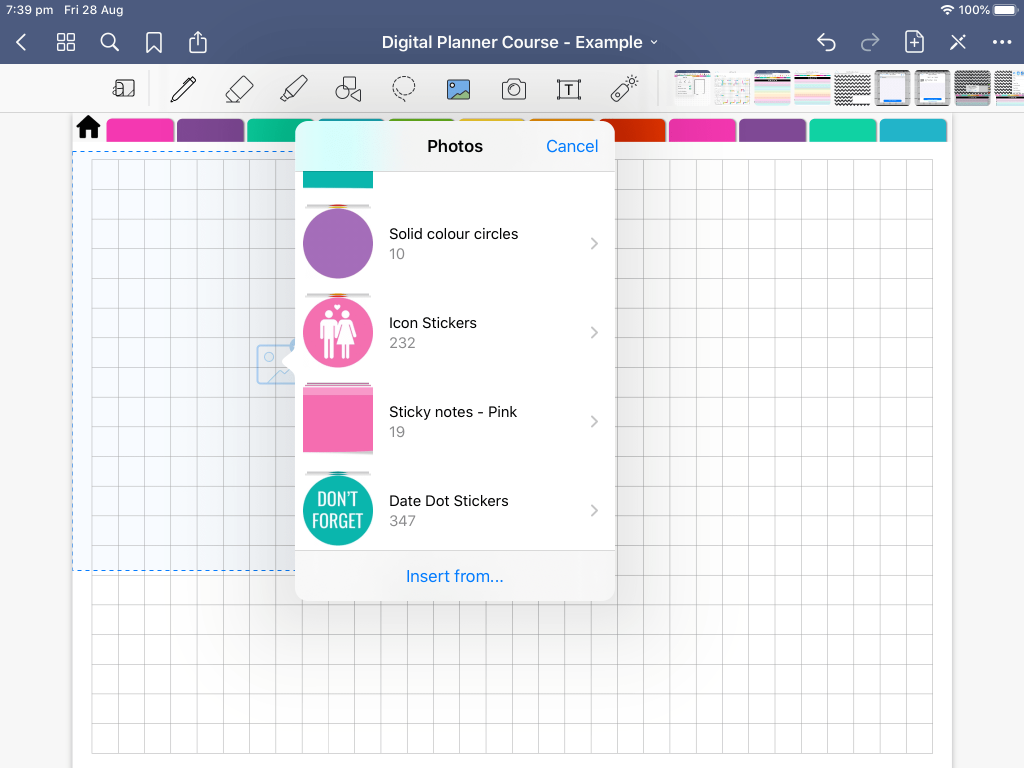
3. Image Albums
I like to use individual PNG digital stickers rather than a sticker sheet I need to crop every time I want to use a sticker. I know some people set up a separate Goodnotes sticker book with the stickers pre-cropped but I think that takes too much time to setup. Instead, I create individual PNG's of my stickers, import them into my iPad and then save them in a photo album on my iPad for quick reference.
I tend to use the same 8 rainbow colors so if there's a color I use often (e.g. for color coding), I'll create separate folders for each color, organized by themes or type of sticker (icons, sticky notes etc.)
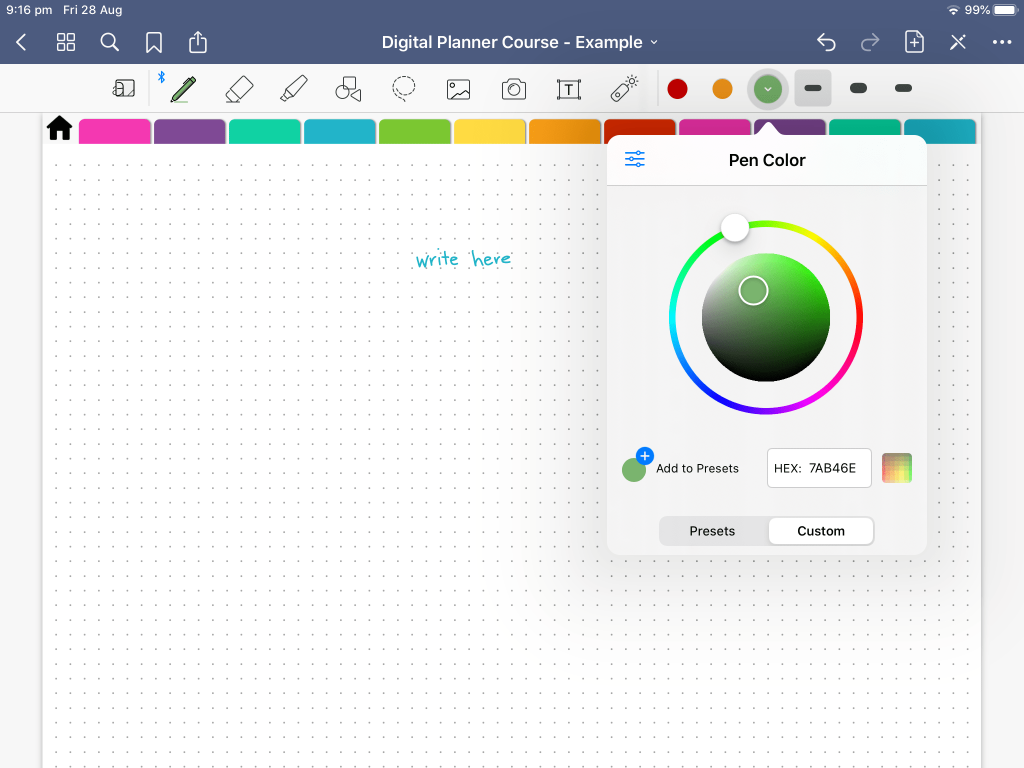
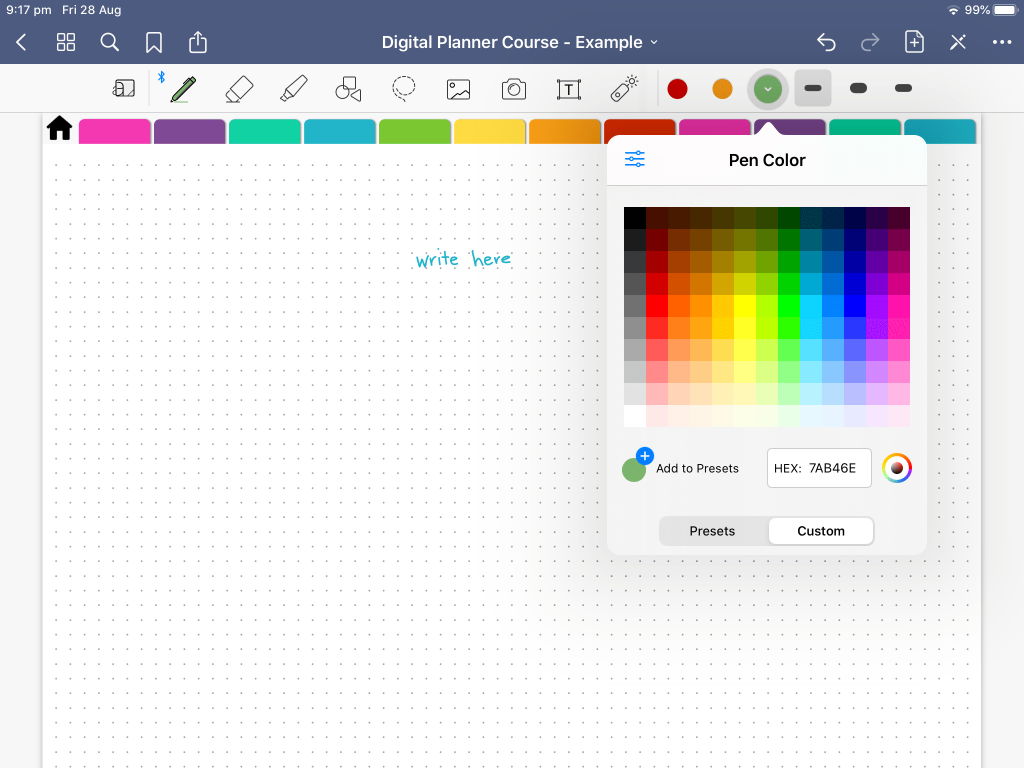
4. Custom color
If you have a favorite shade of a certain color e.g. green that you like to use, you can enter the 6 digit hex color code and then save it in your presets for quick reference to use later.
You can also experiment with colors using the color wheel…
.
…or the color grid.
![]()
Related post: Digital habit tracking in Goodnotes versus habit tracking on paper
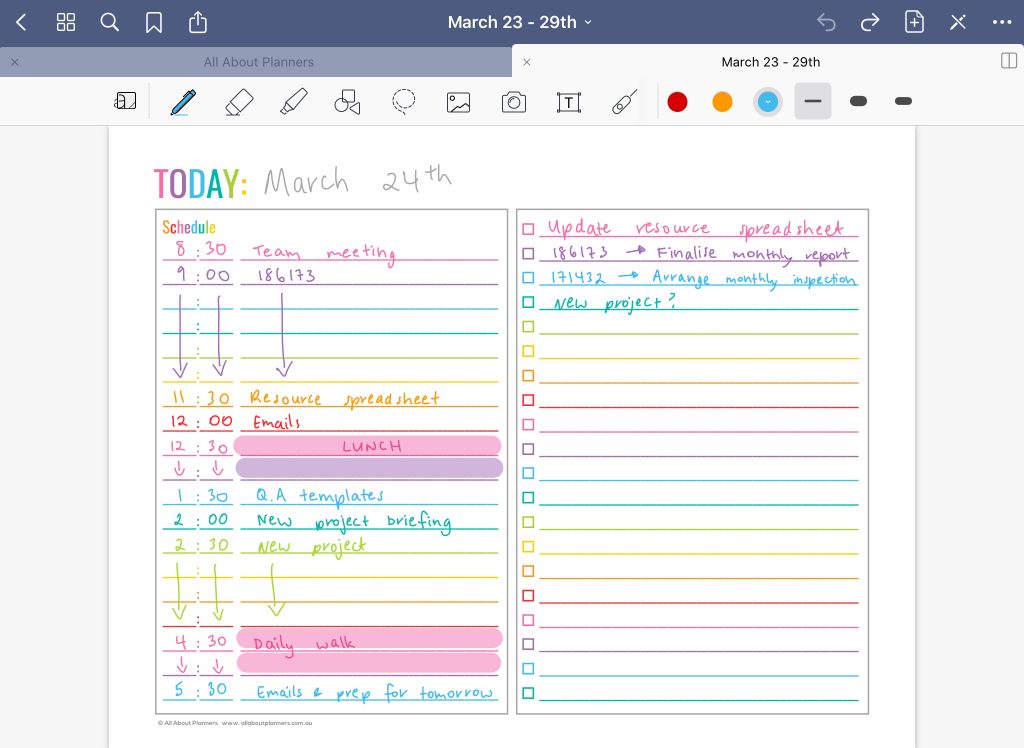
You can change the color of text after you've written it too, and change the colors of your highlighters to match the text you've written.
To change the color of your text after writing use the lasso tool around the text, tap on the screen and select 'color' from the pop-up menu.
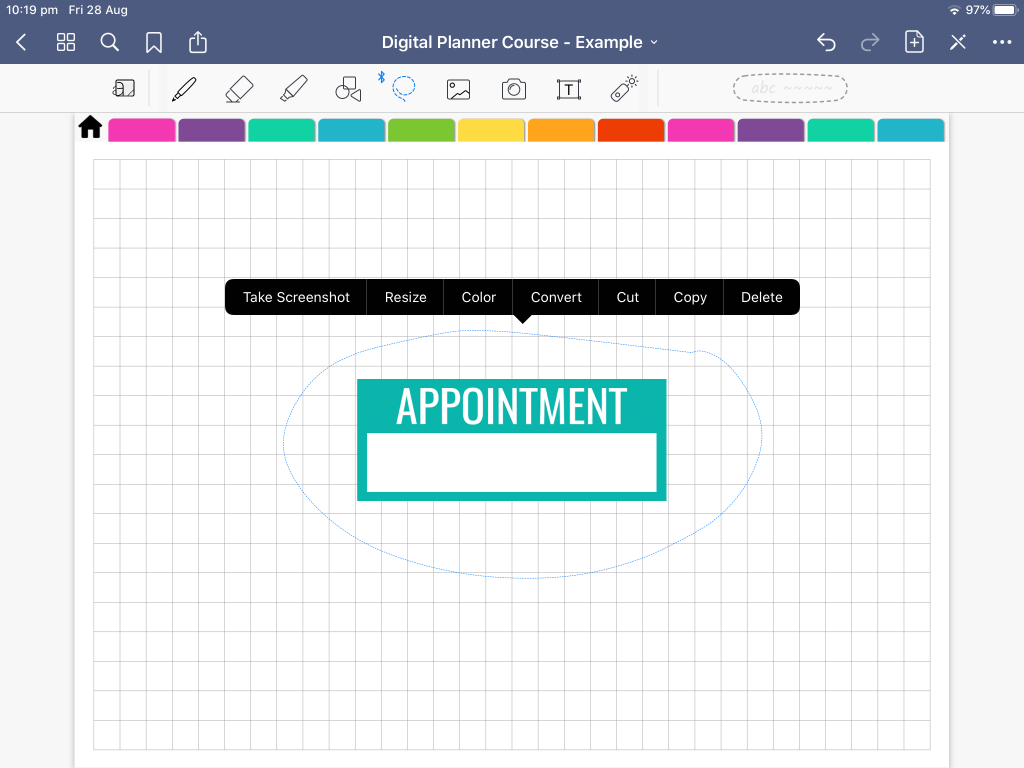
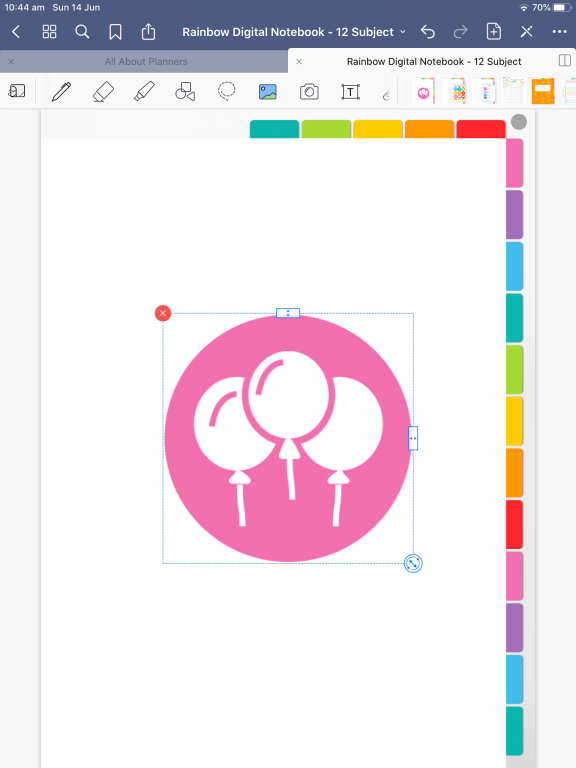
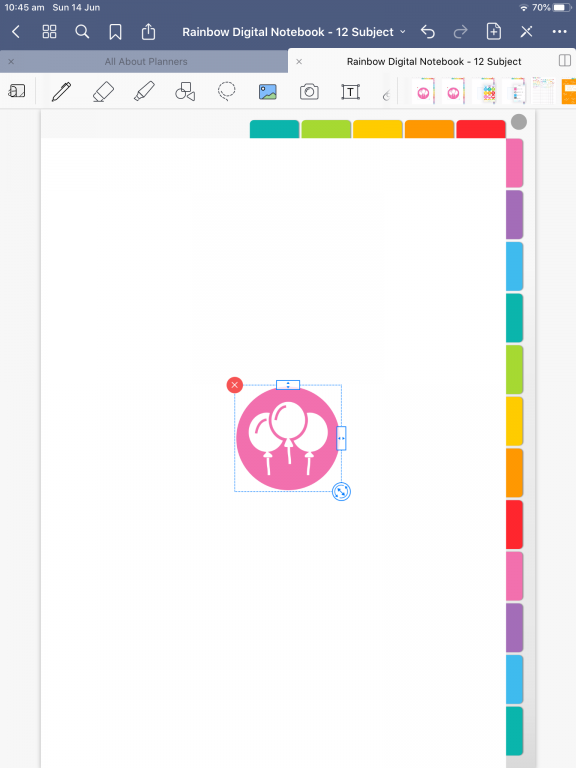
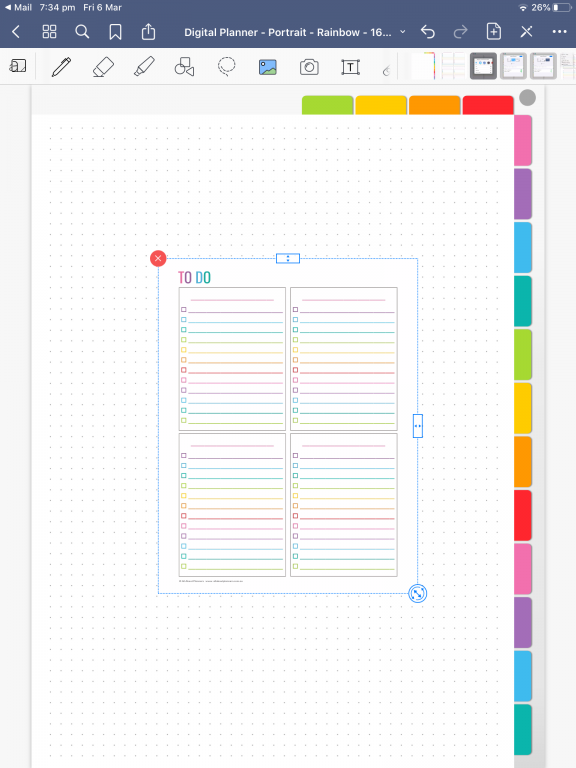
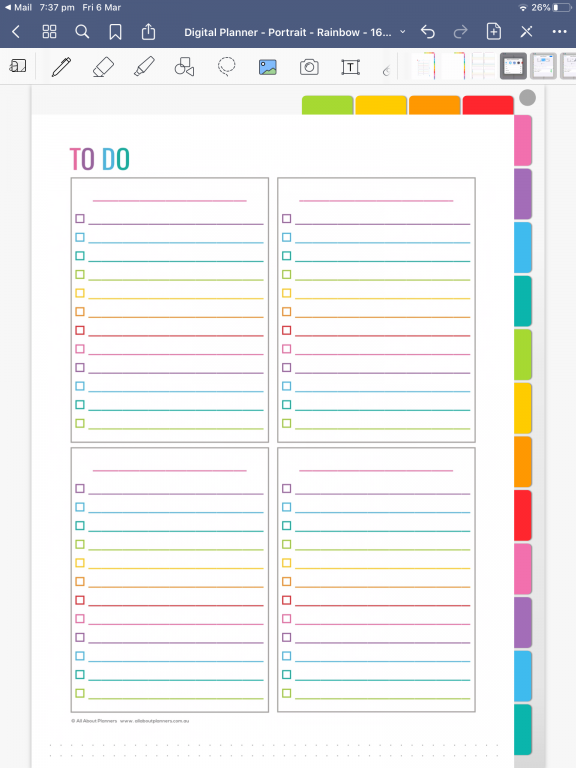
5. Resizing stickers
Unlike in a paper planner you don't need to worry about stickers being the right size, you can make them bigger, smaller, wider or narrower with Goodnotes' resize tool.
I resize one to the size I want, then import the others and resize them by 'tracing' / placing them over the top so I can keep the size consistent. Then, once they're the right size I'll move them to the position I want.
To copy a sticker and avoid re-importing, with the image menu selected, tap on the sticker until the blue border around the sticker appears. Tap and hold on the sticker until it looks like it's enlarging / lifting off the page. Drag your Apple Pencil and a duplicate of that sticker will pop up. Now you can resize and re-position as needed.
A bit backwards, but I find it's easier to resize down if you first expand the image out (resize up), and THEN drag inwards to make it smaller.
6. Resizing printables
You can use any printables in a digital planner. I did a tutorial in this post.
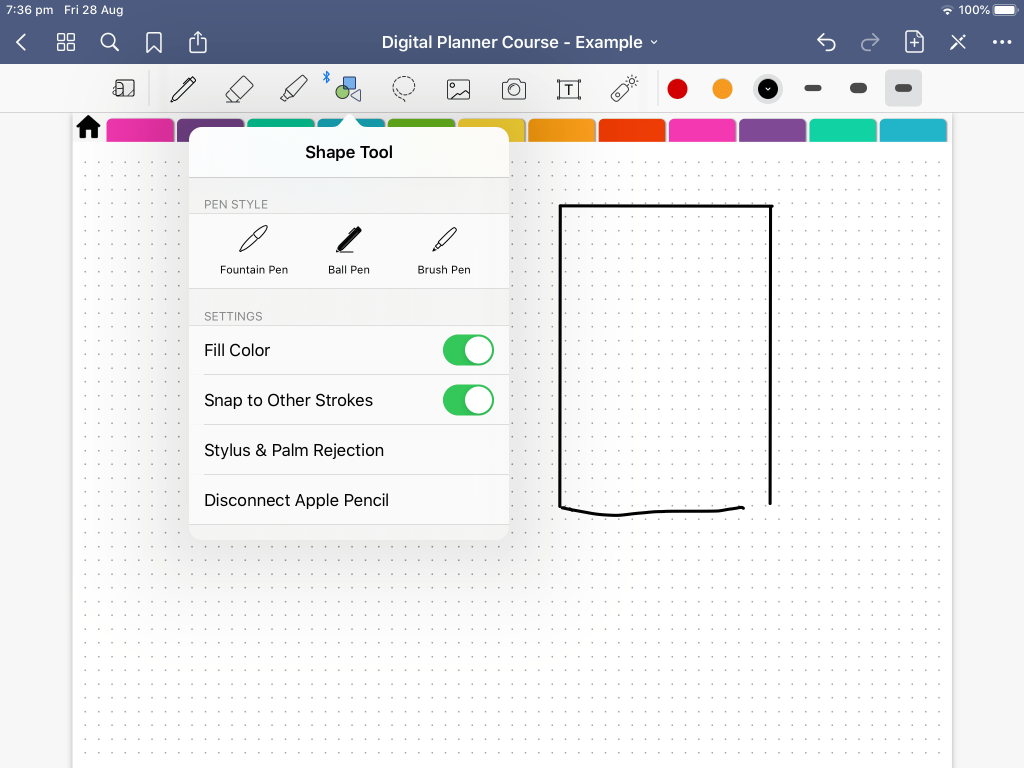
7. Straight lines
In the shape tool menu, make sure 'snap to other strokes' is toggled on (the oval should be green). Now when you draw a line it will automatically straighten. The only problem with this tool is that if you connect the lines and you have a little bit extra, the erase tool will erase most (if not all) of the line and any line touching that one, rather than just the little excess.
Here's a good example of drawing freehand lines with the pen tool versus the shape tool when 'snap to other strokes' is selected. You can do the same thing with the highlighter tool as well.

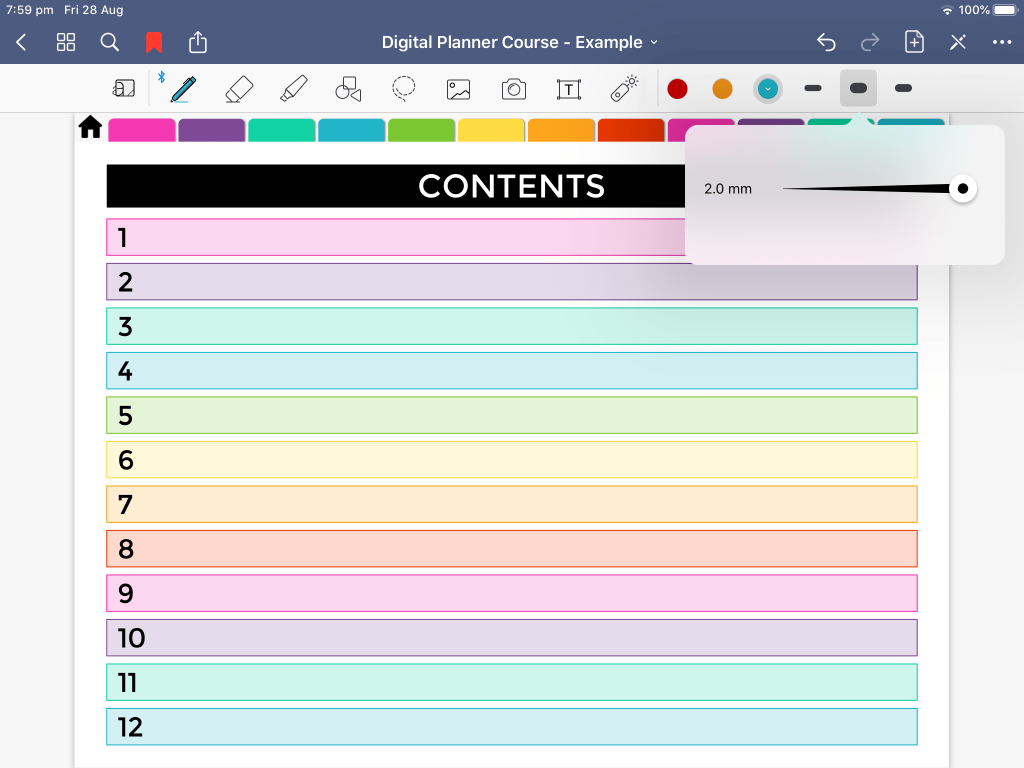
8. Pen thickness
In my paper planner, I usually use the fatter end of a dual tip pen (or I'll just grab a marker pen) for writing headings. You can do the same thing in Goodnotes. Unlike pens which usually come in 0.3mm, 0.4mm, 0.5mm, 0.7mm and 1mm, you can choose any size up to 2mm.
9. Cropping
If you've purchased printable planner stickers in the past you can turn them into digital planner stickers by importing the sticker page into Goodnotes and then crop them by following this tutorial I previously posted.
You can scan in paper sticker sheets, crop them and turn them into digital stickers too. If there's pattern paper you like that you want to use for decorating you can scan that in and turn it into a sticker as well.
Read more: Goodnotes: How to crop individual images from a PDF, JPG, PNG, sticker sheet, clipart etc.
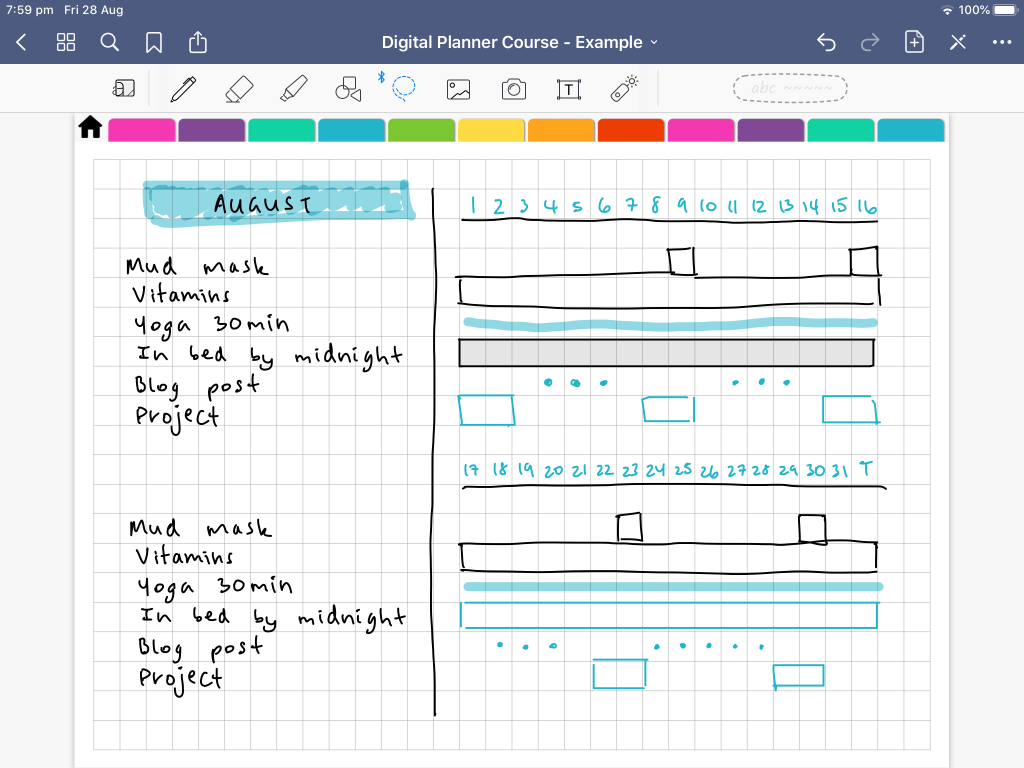
10. Pages
If you want to reuse a printable you've imported into Goodnotes, a page of a digital planner you've purchased, or a page you've written on, you can just duplicate that page rather than re-writing everything. This works great for recurring tasks like monthly cleaning routines, weekly to do lists and monthly spending trackers.
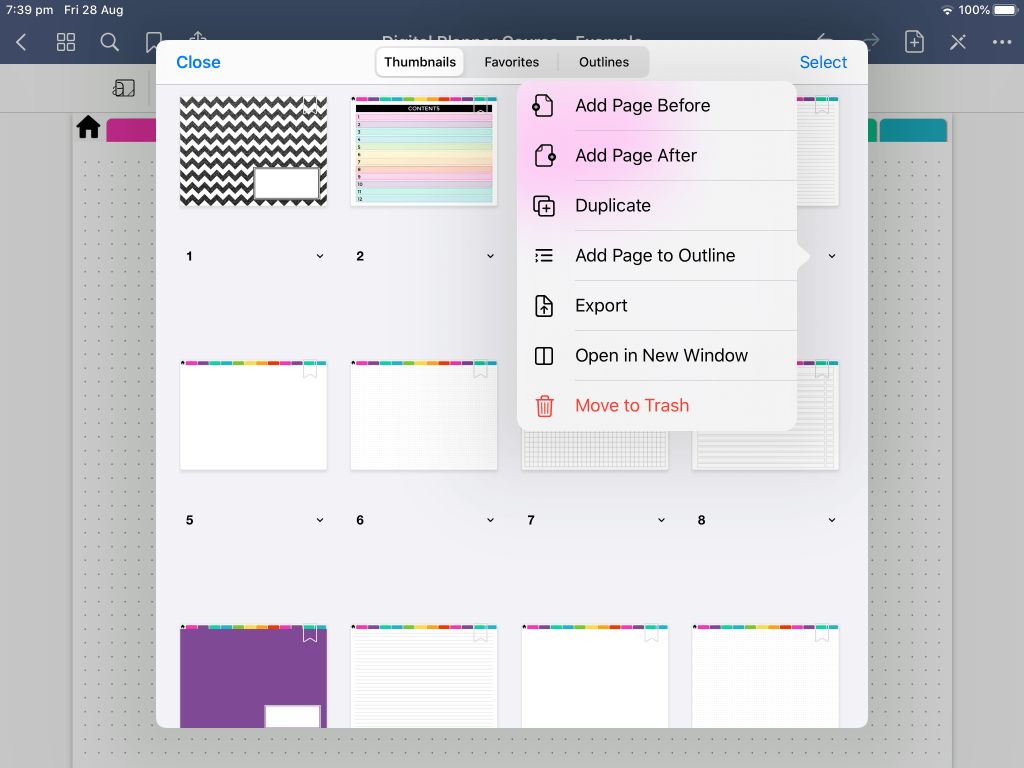
By clicking the 4 squares in the top left corner in Goodnotes you can bring up the page preview menu.
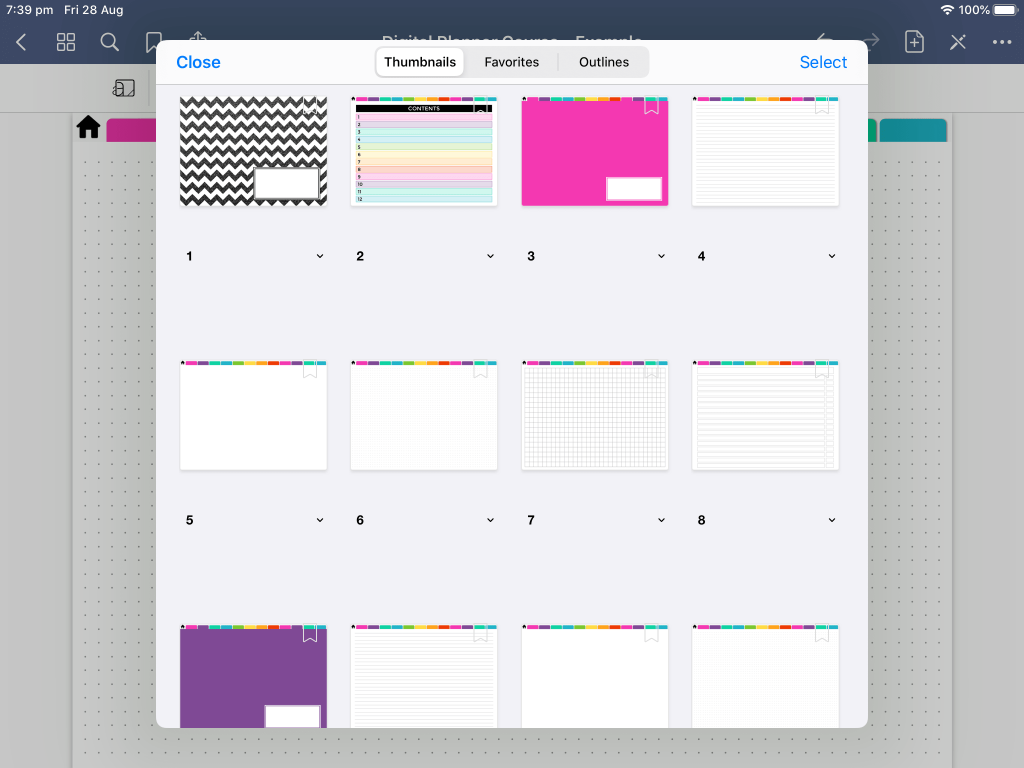
In this menu you can tap the downward pointing arrow on pages you want to duplicate or delete. You can also rearrange pages by pressing and holding your finger on a page, and then dragging it (while still pressing on your iPad screen) to where you want it to go. Once you're happy with it's new location, lift your finger off your iPad screen.
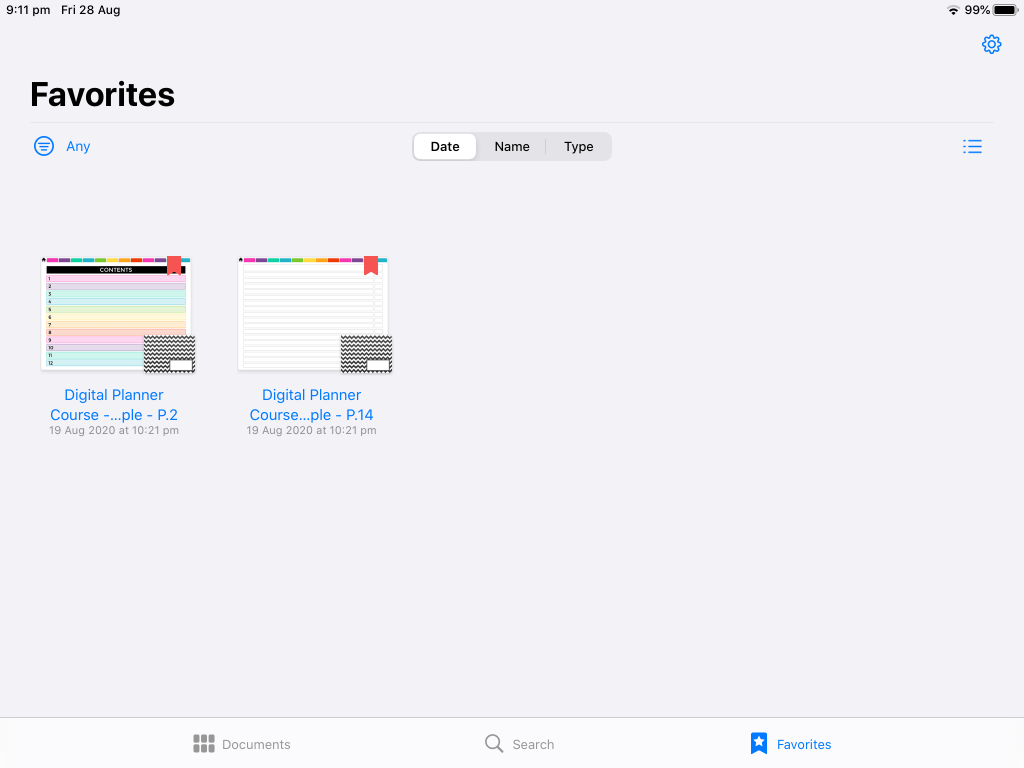
If you have favorite pages you want to quickly navigate to e.g. extra pages at the back of your digital planner that don't have their own hyperlinked tab, you can add them to your favorites by tapping on the flag banner outline in the right hand corner of the pages.
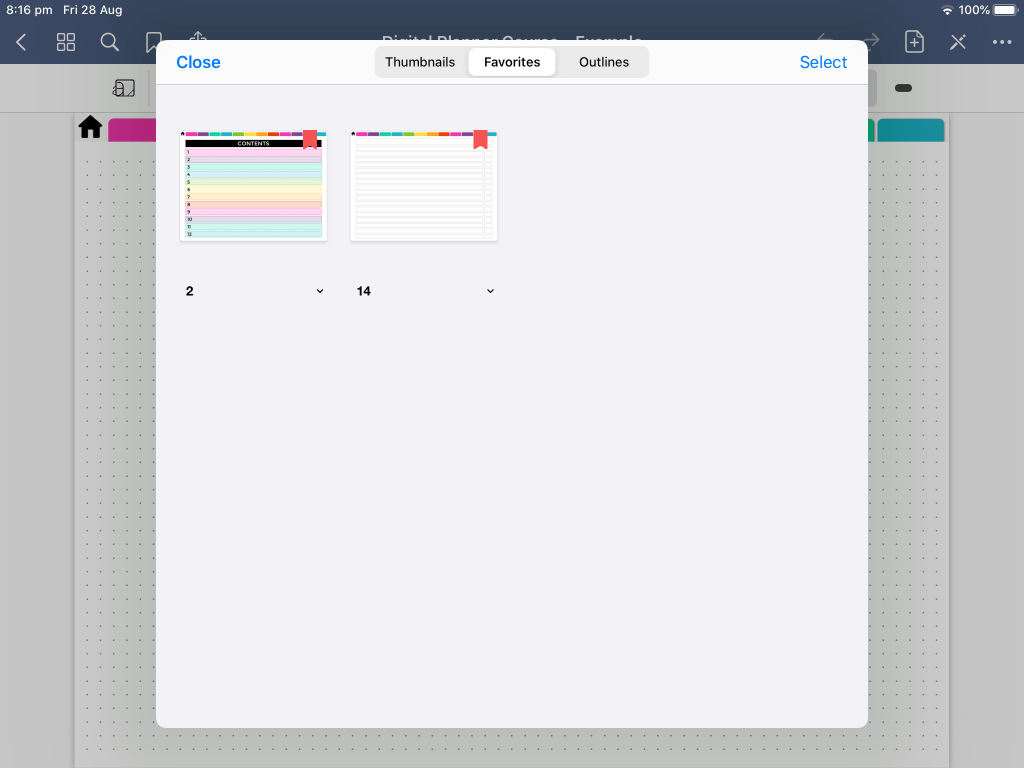
You can also view bookmarks from all of your planners and notebooks in the main Goodnotes notebooks screen:
There are more tools in Goodnotes but the ones I mentioned in this post are the ones I think are the most helpful, and the ones I use the most often.
If you want to learn how to make the digital notebook I used for the examples in this post, as well as digital planners, I teach how to make them in my ecourse.
More digital planning
- How to add any printable to your Goodnotes digital planner
- How to resize any printable PDF and add it to your digital planner (in Goodnotes)
- How to unzip files on an iPad (using free iZip tool)
- How to add digital planner stickers into Goodnotes (2 ways)
- Digital Planner versus Paper Planner: Which is right for you? (Pros & Cons)
Found this post helpful? Pin it!

How To Create Digital Planner In Goodnotes
Source: https://allaboutplanners.com.au/10-useful-tips-for-digital-planning-using-goodnotes/
Posted by: proctorgoicerouth.blogspot.com
0 Response to "How To Create Digital Planner In Goodnotes"
Post a Comment